Watercolor tutorial: Miniature tree
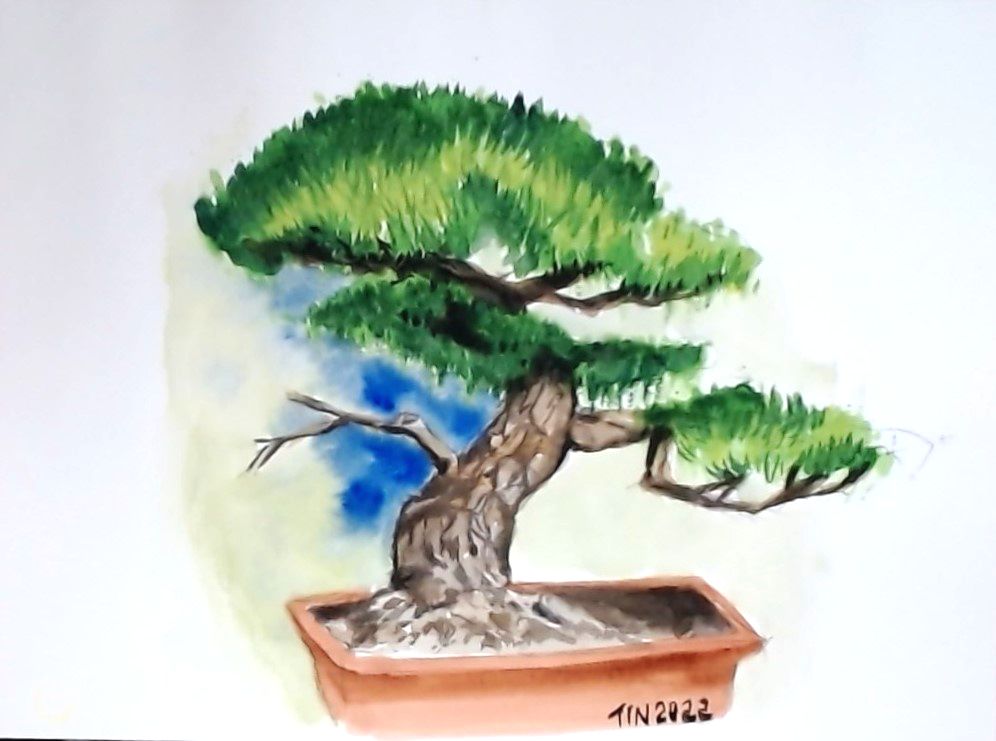
Hi, welcome to my channel, today we will paint a “Miniature tree” with watercolor, please prepare some tools you will need. First, use a pencil to draw a rough sketch from the picture, okay, let’s mix some gray color from 3 parts of black and 7 parts of white with water (percentage 50/50 paint and water), use the #6 pointy brush to paint the shadow area of the trunk and branch, when it dries, mix Yellow Ochre with Burnt Umber for the middle layer, - it will cover the shadow area, so we make sure the shadow is dried. Use the gray again with some Yellow Ochre for the lighter area, now we will see the color tone with 3 layers.
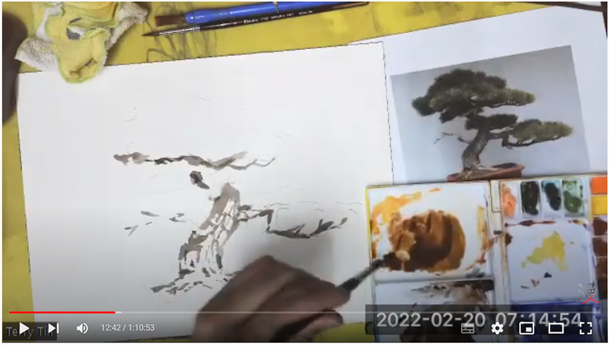
Then mix the Burnt Umber and a little Black, use the #4-pointy brush to define the dark area and make it more chiseled. Try to follow the reference photo to draw the tree pattern, just try to make it similar, it doesn’t need to be the same.
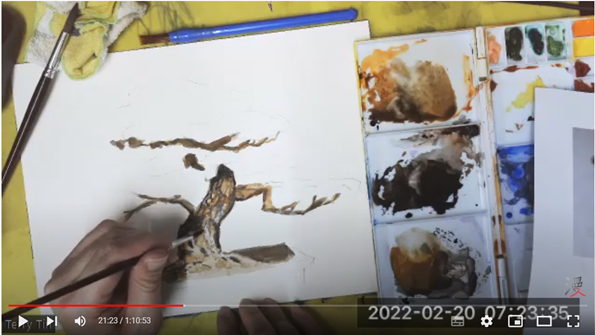
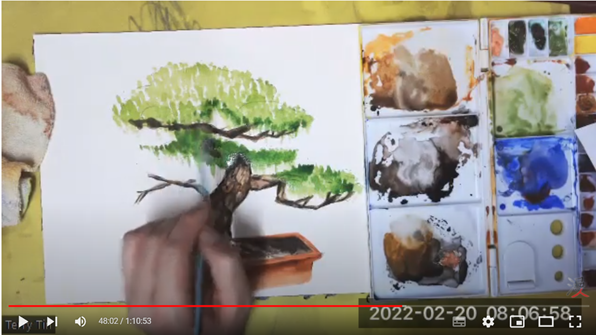
Use Burnt Sienna to paint the flowerpot, you need to draw the correct perspective first . Add the shadow detail to finish the flowerpot.

Let’s paint the leaf , we will start from the first value which is Light Green, I used the #6-pointed brush and paint the shape of the leaf in a gentle tapping way, then add the middle value with more Sap Green to the Light Green color, finally add Viridian Green and little Ultra Marine for the shadow detail on position. We are almost done, let’s look around the painting and check if there is something that needs fixing or if you want to add more details.
Everything is dried, add some water around the tree, add a dip of color like orange or blue to make the main body stand out more, all done! Congratulations! Don’t forget to sign your name on the painting! Be proud of it, I will see you in the next class, Bye-bye.
